




Financial News
Your E-Bike Delivery Day: From the Shipping Box to a Ready-to-Ride Plan
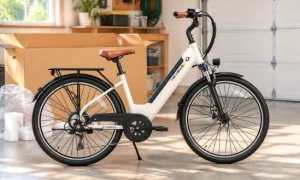
The arrival of an e-bike can make it tempting to rush straight from the box to a first ride. A better delivery day leaves time to check the shipment, identify the instructions, and organize any assembly help you need. Getting those steps right makes it easier to deal with a missing part or transport damage while the details are still clear.
You do not need to turn the unboxing into a technical project. Think of it as receiving a valuable piece of equipment: establish what arrived, keep the relevant records, and follow the process for your exact model before using it.
Prepare a space before the courier arrives
Clear enough room to open the package without blocking an exit or shared passage. Choose a place where small components can be kept together and the bicycle will not need to be carried away halfway through the process. Have the order confirmation and a camera available.
Read the seller’s current delivery and damage-reporting instructions before the parcel arrives. Check whether there are directions about inspecting the outer package or contacting support. Use the terms for your order rather than assuming every delivery service follows the same procedure.
Arrange help if the package is too heavy or awkward for you to move. Do not make lifting a sealed carton the first test of your strength. Planning the move from the entrance to the unboxing space can prevent a rushed decision in a crowded hallway.
Record the shipment before discarding anything
Inspect the outside of the box for visible damage and photograph relevant areas. Keep the shipping label and order details in your private records. Open the package as instructed, taking care not to cut into concealed parts, cables, or protective materials.
Compare the contents with the included list. Keep small fittings in labeled groups, and distinguish packing material from components. A part attached temporarily for shipping may look different from its final position, so use the instructions before deciding something has been installed incorrectly.
If you find damage, an unexpected component, or a missing item, record it clearly and contact the seller through its official channel. Do not ride the bicycle while a safety-related issue remains unresolved. Clear photographs and an accurate description help explain the problem without speculative diagnosis.
Identify the right instructions and support path
Confirm the exact model and version on the order, frame information, and manual. A video for a similar-looking bicycle is not necessarily the right assembly guide. If a diagram or supplied part does not match, resolve the discrepancy before continuing.
Read the required tools, tightening instructions, and inspection steps before starting. If the work exceeds your experience, arrange qualified help. Wheel installation, steering, pedals, and brakes deserve more than a guess based on how another bicycle was assembled years ago.
Keep a list of questions instead of improvising around missing information. Ask the seller or a suitable mechanic for the model-specific answer. This is particularly useful for a first-time owner, because shipping preparation and ordinary rider adjustments are different tasks.
Set up the charging arrangement separately
Identify the approved battery and charger supplied or specified for the bicycle. Follow their instructions for inspection, connection, and charging conditions. A plug that fits should not be treated as proof that another charger is suitable.
Choose an appropriate charging location that is dry, clear of combustible clutter, and away from escape routes. Stay present and awake while charging. If the battery or charger appears damaged, do not connect it to see whether it works; contact the appropriate support provider.
Record where the manual and charger will be stored after delivery day. Household members should know which charger belongs to the bicycle. That simple organization makes it less likely that compatible-looking equipment will be mixed up later.
Make the first ride a separate appointment
After assembly and all required checks, allow time for fit adjustments and a familiarization session in an appropriate place. Learn the controls, assistance behavior, and braking response without combining that learning with a busy commute. Use the owner’s instructions for the pre-ride inspection.
If you have not purchased an electric bike yet, include delivery and setup in the comparison. Ask what arrives assembled, what the owner must complete, and how support is obtained. Those questions help you choose a buying arrangement that fits your skills and available help.
When researching Heybike, consult the current resources for the exact model and the terms attached to the order. Do not assume that a general assembly video establishes what is included with every bicycle or which local service provider will perform the work.
Finish with records you can find again
Store the receipt, model details, identifying information, manual, and any support correspondence together. Keep photographs private if they show labels, addresses, or serial numbers. Follow the seller’s current guidance about packaging retention and any unresolved delivery issue before throwing the materials away.
The successful end of delivery day is not necessarily a long ride. It is a bicycle with its contents checked, setup completed correctly, and next steps understood. Leaving enough time for those tasks helps the first outing begin with fewer avoidable questions.
If you believe this article contains misleading, harmful, or spam content, please let us know.
Report this articleMore News
View More




Recent Quotes
View MoreQuotes delayed at least 20 minutes.
By accessing this page, you agree to the Privacy Policy and Terms Of Service.